Labels

BASS (50) COMPRESSION (32) DRUMS (45) EFFECTS (49) EQUALIZATION (30) GUITAR (112) HOME RECORDING (95) IMPULSES (21) INTERVIEWS (19) KARAOKE (1) LIVE (10) MASTERING (61) MIDI (21) MIXING (179) REVIEWS (156) SAMPLES (69) SONGWRITING (19) SYNTH (3) VOCALS (31)

Saturday, May 30, 2015

HOW TO MIX A LIVE BAND (a guide for dummies) 3/4


Hello and welcome to the third part of this week's article!
Last week we have seen how to make the gain staging for microphone inputs, today we will talk about the last 2 channels of  our mixer, that we have reserved for "keyboards - d.i.".

If we have a keyboard, it's much likely that it will have a left and right output, so we must connect them to a d.i. box to balance the signal, and from there go into the channel box, this way we will be able to control both left and right channels on the mixer, but if the keyboard player has more outputs, he will need an additional mixer to connect all of them, make a "keyboard submix", and from the stereo output go to the d.i. box, and from them to the channel box and to our mixer.

Since we have only 2 channels for quite a wide array of things left, we need to be creative: if the band has some pre-recorded base we should treat it the same way we could treat keyboards, or if they use both things, we will have to dedicate a single mono channel to keyboards and the other one to the base. The gain staging procedure it's the same explained in the part 2 of this guide, with the addition that usually d.i. boxes have a db attenuation switch, if the signal it's too loud, and a ground/lift switch, to move if there is some hum.
Notice that often the last channels of a mixer also feature a stereo input, which means 2 jack inputs controlled by the same fader; this way is also possible to connect both left and right keyboard channels to our stereo channel.
Obviously if we don't have d.i. instruments, we can still treat the last 2 channels of our mixer as all the others, to control microphoned instruments.


Group channel tracks and Fx tracks: on some mixer there are faders (in this example we're talking about the 2 blue ones at the bottom right of the mixer) that can control a full group of other tracks, so basically we can apply to a live environment the same rules we have seen for group tracks and fx tracks used on a DAW, when mixing (Click here for a dedicated article).
If the mixer has this feature (like this one on the photo, which has 2 group tracks), each one of the 12 channels will have 3 selections, near each fader: Mix, Group1 and Group2.
If we choose Mix, this channel will be routed straight to the stereo mix, so its final volume will be only decided by the Master Fader.
If we choose a Group instead (for example we can send all vocals on Group1 and all guitars on Group2), we will be able to control all the vocal tracks submix with the "Group1" fader and all guitars submix with the "Group2" fader, and obviously both these groups are controlled by the Master Fader, anyway.
Fx Track: this track it's represented in the mixer on our example by the only white fader.
On this track we can choose an effect or a combination of effects (for example Reverb + Delay), and decide the amount of effect to apply, then on the single channels we can choose the amount of signal from the single tracks that should be fed to the Fx track, and with the Fx track fader we can decide how much effected signal should be send to the Master Fader, or to a Group Track, and to the various Aux Sends.

For example I can choose to set the fx control on the vocal track on 5/10. This means that half of the dry signal of the vocal track will be sent into the fx track, and will be effected; then with the fader control of the fx track, I can decide the level of this effected part of the signal to send to the stereo mix, or to a group, or to an auxiliary send.


CLICK HERE FOR PART 1 OF 4!

CLICK HERE FOR PART 2 OF 4!

CLICK HERE FOR PART 4 OF 4!


Become fan of this blog on Facebook! Share it and contact us to collaborate!!

Saturday, May 23, 2015

HOW TO MIX A LIVE BAND (a guide for dummies) 2/4


Hello and welcome to this week's article!
Today we proceed with part 2 of our 5 parts article about how to mix a live band.
After we have set up everything on our stage properly, we should have a channel box with 12 numbered xrl jacks, that we should connect to our mixer respecting the numeric order.

Here is my channel list, but you can modify it according to your own taste:

1   kick drum
2   snare drum
3   tom 1
4   tom 2
5   floor tom
6   lead vocals
7   backing vocals
8   guitar 1
9   guitar 1
10 bass guitar 
11 keyboards / d.i. 1
12 keyboards / d.i. 2

If we want to make sure we will find immediately the channel we're looking for we can use also a strip of writable tape to put below all channels, so we can write under each channel what instrument is plugged.
Each channel of the mixer looks the same, and a typical single channel strip it's the one present in the classic Mackie mixers, and it is depicted on the top of this article.
Let's analyze it, starting from top:

- we got the Xlr and normal jack input

- then we have a high pass filter button which takes out everything below 75hz (which is useful, so
we can leave the lowest frequency area only to certain instruments, such as bass and kick drum).

- a Gain knob (that sometimes is called Trim)

- two Aux Controls (which control two stage monitors, and decide how much sound from this channel will be played on monitor 1, which is connected to the Aux 1 out, and to the monitor 2, connected to the Aux 2. On the stage plan of the first part of our article there were 3 monitors, so the mixer must have 3 Auxiliary outs and 3 Auxiliary knobs).

- an Eq section, to control high, mids and lows, which is good to correct some unbalancing in our tone or to make some instrument to pop out more. Often this section is used to tame the lows and make the sound more intelligible.

- an FX knob (that on the photo of the channel strip is absent but that is present on many mixers and that controls how much effect, like delay or reverb, will be sent to the channel)

- a Pan knob, which lets us decide the position of the instrument into the soundstage. Keep in mind that a live environment is different from a studio one, so apply less extreme settings than you would on a record!

- a Mute and a Solo control, to mute the track or to hear it alone.

- the Volume fader, to control the channel's overall volume.


Ok, now we have all jacks plugged in the right channels, and we know all channel controls.
What do we have to do?

We must decide the gain sensibility. With the gain control we decide how high is the level of the incoming signal, then we can apply all the variations we want on each channel (eq, pan etc..) and finally with the volume fader we will increase or decrease the overall channel level to fit that instrument better in the mix.

To set the gain sensibility we must use the Gain Setting Procedure for each channel.
This procedure will make us set the gain knob (the one located on the top of the channel strip) in order to let out mixer "hear" correctly the incoming signal. If we have a PFL BUTTON (pre fader listen) we should turn it on for the gain setting procedure, in order to hear only the gain control, bypassing the volume fader. When you press that button you will see the level of that channel's input on your mixer's meter (which are the green, yellow and red leds located on the right in the mixer).
What we want is to use the gain knob to find a position that lets us avoid the level to hit peak or to be too low: the level of the instrument should be halfway, with occasional peaks in the yellow area. Press only one PFL button at a time, otherwise the meter will show the combination of both channels and you won't know which one is too high or too low.

Once we have done this procedure for all channels, the Gain Setting Procedure is over and we should have each channel's gain set to the optimal level.
Now we can proceed adjusting the Eq, the Pan (and if we can, the Fx, because vocals usually could use some reverb) and the volume of each channel to fit them better in the mix, until we have a stable mix in which each instrument can be heard decently.


CLICK HERE FOR PART 1 OF 4!

CLICK HERE FOR PART 3 OF 4!

CLICK HERE FOR PART 4 OF 4!


Become fan of this blog on Facebook! Share it and contact us to collaborate!!

Saturday, May 16, 2015

HOW TO MIX A LIVE BAND (a guide for dummies) 1/4


Hello and welcome to this week's article!
This is the first part of a tutorial in which we will analyze the bases to mix a live rock/metal band, on a small venue (200-300 peope audience): basically the average small live gig.

The idea of this tutorial came into my mind watching so many gigs in which the bands rented the p.a. system (public address system, which is the system composed by a mixer, microphones, loudspeakers and so on) and tried to set it up without a clue of what they were doing, and not wanting to hire a live sound engineer for the night.
The result is usually a mess: the band doesn't hear itself and plays bad, the audience doesn't understand a thing and eventually everyone gets scorned.

Please note that this is not a super comprehensive guide, and the most expert live engineers will notice something that may diverge from their workflow, but I just wanted to give the bases in the easiest and most understandable way possible, to get a decent sound live.

Ok, let's start with a description of the average cheap p.a. that can be rented and that we will use for our example.

- a cheap 12 channels mixer
- 2 speakers for the audience
- 3 monitors for the stage
- 2 microphones for the vocals
- 5 microphones for the drumset
- 2 microphones for the guitars
- at least a dozen of xrl cables
- a couple of d.i.
- a channel box to gather together all the jacks from the various instruments on the stage to the mixer below.

So in this first part of the guide we will talk about SETTING UP THE STAGE.
Obviously microphoning a live stage is a simplified version of microphoning instruments for the studio (for example a drumset or a guitar amp):
the first thing obviously is to have clear in mind how the disposition of the musicians and the instruments, amps, cabinets, microphones and monitors should be (and the image on the top of this article is a standard stage-plan, with the position of everything on the stage, and for this serie of articles we will use that as "standard disposition").
Of course to set up the stage we will have to position the drumset if possible on the center, moved to the back, the microphones in the part of the stage closest to the audience, and the other amplifiers (and the keyboard) on the sides.
The monitors (in this case 3), should be set in a position in which they can be heard from 2 or 3 musicians, so we can set them like depicted on the stage plan, maybe turned a little towards the singer, if needed. A third monitor should be used only for the drummer, and in our example we have put it on the side of the drumset.

Once we have decided where everything should be, it's time to plug in all the amplifiers, to check out if we have enough electric plugs for everything, and then we can start microphoning everything.
For the drums, we have 5 channels available, and we will use them for:
- kick
- snare
- tom 1
- tom 2
- floor tom
Notice that we are not microphoning the cymbals, because in the small venues they are clearly audible even without microphoning, the bleed on the other drum microphones is sufficient.
Often drum microphones comes in a suitcase with clips to fix them right into the drum shells.

Now we will use 2 microphones for the 2 vocalists, then 2 microphones for the guitar amps.
To find the right position of the microphone towards the speaker, check out our guitar microphoning guide.
For the bass, often we won't have to microphone the amplifier, because many bass amps has a "mixer out" or "d.i." out, which is made to go straight to the mixer, so we will connect it from that out to our channel box.

Finally, the last two channels are reserved to the d.i. boxes, on which we can connect a keyboard (with the left and right outputs), or a computer, or an mp3 player with some pre-recorded base, or some other instrument that we need to amplify, or if we don't need them, we can just leave them alone.

We should write down exactly what xlr jack goes into the channel box (for example channel 1: kick drum, channel 2: snare drum, and so on), so that we will have the perfect control on everything when mixing.


CLICK HERE FOR PART 2 OF 4!

CLICK HERE FOR PART 3 OF 4!

CLICK HERE FOR PART 4 OF 4!


Become fan of this blog on Facebook! Share it and contact us to collaborate!!

Saturday, May 9, 2015

REVIEW: Marshall MA50H


Hello and welcome to this week's article!
Today we're going to talk about an amplifier, the Marshall MA50H head.
This head is a 50w all tube, made in China, which sets itself in the lowest price area of the Marshall tube amp catalog, with a price as low as around 300€ in Europe.

A Marshall all tube amp for 300€? This would be more than enough for many people to be attracted by it, but as we will see, there is a catch.

This amp, compared with the others of the Marshall lineup, it's one of the very few that looks and feels when playing very cheap, and in my opinion probably not up to the Marshall standard.
First off aestethically, to give the impression that the tubes are lit and working there is actually a red LED hidden near them, which is really a cheap workaround, but beside that, the tone has been the biggest letdown.

The amp volume is decent, not particularly loud but enough to be heard, it's the tone itself that it's thin, and sometimes gives the impression we're not dealing with a tube amp: there is not much "thickness", nor much harmonic richness, and overall the amp sounds cold and dull.
There are two channels, clean and overdrive, and the overdrive channel has a boost function and a "crunch balance" knob; the amp also features (as many other Marshall amps) a Reverb knob, Presence and Resonance.

Overall this head is usable, the tone character is in line with the typical Marshall sound, but everything sounds colder and thinner, so our suggestion is to try it before buying it, and also to try other amps which are in the same price range, as for example the Peavey Valveking, which under many points of view sounds better and less cheap, always using real tubes.


Tech Specs:

- Power: 50W
- Preamp Tubes: 3x ECC83
- Power Amp Tubes: 2x EL34
- Channels: 2
- Clean Channel: Volume, Treble, Middle, Bass
- Overdrive Channel: Volume, Treble, Middle, Bass, Gain, Crunch Balance
- Master Controls: Resonance, Presence, Reverb
- Overdrive Boost
- Serial FX Loop


Become fan of this blog on Facebook! Share it and contact us to collaborate!!

Saturday, May 2, 2015

Gain Staging and TRIMMING! What is it and how to use it?


Hello and welcome to this mix article!
This article is linked to our Gain Staging one, so we will proceed on analyzing how to set the right input levels, which may seem something easy and to be taken for granted when it's not: it's the base for a good sound.
Botch the gain staging step while recording and you will never have a decent project to mix.

The one that we may call "TRIMMING PHASE" sets itself ideally before the BALANCING PHASE. The balancing phase it's the one in which we move the faders in order to create a mix which must be as stable as possible, so that when we will add processors such as EQ and COMPRESSION we will not overdo, we will use them just the small bit we need to keep our tone stable, intelligible and consistent.

How does the Trimming Phase work? Let's assume we have recorded a band: the faders or out DAW are all at 0db so the sounds are still a bit unbalanced; we need to play the whole track looking at the mixer section of our DAW (for example in the picture on the top of this article we are looking at the Cubase/Nuendo interface, but it should be the same for most of the Daws).
As we can see, below the fader of every channel we will have a number, for example under the fifth fader displayed we can see a -7,4, which means that the loudest part in that song played through that channel is -7,4db full scale.

Now if we have an integrated gain plugin we can use that one, otherwise we can download a gain plugin and set in in the first vst slot of our channel, so that we can deal with the gain of each track BEFORE start moving each fader.
If you have already read our Gain Staging article you will have seen that a good level to mix is around -12db, so we should aim to have all tracks around -12db before start moving the faders, to have more room to move them when mixing, therefore with our gain plugin (integrated or external), if we have a -7,4db peak we will need to set it to -4,6 in order to keep that track peaks at -12db maximum.

We should do this process for each channel in order to make the whole song to peak at maximum -12db, and this means that if some track is too low, for example it peaks at -15db, we could also use the gain plugin to add +3db, in order to bring everything up at -12db.

Why do we need to do this?

1) because 12db of headroom means that we have room to push our mix when in the Mastering Phase, making it sound loud and not overcompressed.

2) because if we find a good gain staging before start moving the faders, we will have room to move the faders. If we start mixing with already a fader all the way up or all the way down to correct a weird input gain, we would not have room to balance it during the mixing phase.

Hope this was helpful!


Become fan of this blog on Facebook! Share it and contact us to collaborate!!

Sunday, April 26, 2015

Review and Tutorial: Fabfilter Timeless 2


Hello and Welcome to a new article!
Today we will review a vst Delay made from Fabfilter, a producer that we have already extensively covered with our reviews in the past months.
Obviously, as for all the other Fabfilter products, the plugin is very complete, the interface has many diagrams, and there is a "simple mode" and an "expert mode" which lets us use midi automations too.
The basic interface has obviously the most common controls a delay has, such as "delay time", "feedback", "wet/dry mix", but you can also split the left and right channel and dial the settings indipendently, setting also a filter that will decide what part of the signal will be processed and what not.
The plugin also features 300 presets, divided by instrument, some of which are pretty much "mix ready".
The "expert mode" instead, lets us control the plugin with the Midi automations, and this can lead to some creative use, like step sequencing, or left-right bouncing.
Overall a nice sounding, very complete plugin!

Key Features taken from the website:


- Two delay lines (5 ms to 5 sec) with host tempo sync and panning
- Feedback, cross-feedback and phase inversion
- Tape delay or time-stretching behavior when changing the delay time
- Mid/side processing
- Freeze buffer option
- Over 300 presets
- Tap feature
- Two state-of-the-art multimode filters with filter panning and 11 characteristics
- Interactive filter display
- Easy drag-and-drop modulation with 24-slot modulation matrix
- Modulation source signal visualization
- Interactive MIDI Learn

Sunday, April 19, 2015

Digital Audio Workstation (DAW) 2015 Overview

Hello and welcome to this week's article!
This article is a bit unusual: I wanted to make an overview of the 2015 most famous DAWs, explaining shortly the features and the price range, to help any of you who wants to start recording or to change workstation to choose a new one.
Let's start by saying that this will not be an in-depth review of every daw, we will only focus on the core features and the differences among them, keeping in mind that all of them are good and capable of producing the best music possible, and all of them comes with a collection of plugins bundled in order to start mixing right away without the urge to download 3rd party apps.
Let's get started!


AVID PRO TOOLS: the music production standard for many years, and still a milestone in the world of professional sound engineering, this product has started as a closed ecosystem capable of working only with its own hardware, while today it expanded its compatibility with any audio interface. Instead of buying the Daw, the producer offers today a time license which can be montly or yearly.


STEINBERG CUBASE: The second most common daw used in the studios, Cubase has currently reached the version 8, which promises improved speed, reduced cpu load, a new in-place audio bounce from midi and a wide library of plugins, samples and sounds (plus the new ui is really good looking).
The prices varies from 99€ to 599€, according to the number of features of the chosen version.


ACOUSTICA MIXCRAFT: ranging from 89,95$ to 164,95$ this Daw is obviously cheaper than the previous two and less known, but it has a good reputation due to a particularly simple and easy workflow, which makes it really suggested for songwriters. Plus the "Pro" version is packed with plugins and virtual instruments that makes it a very complete solution.


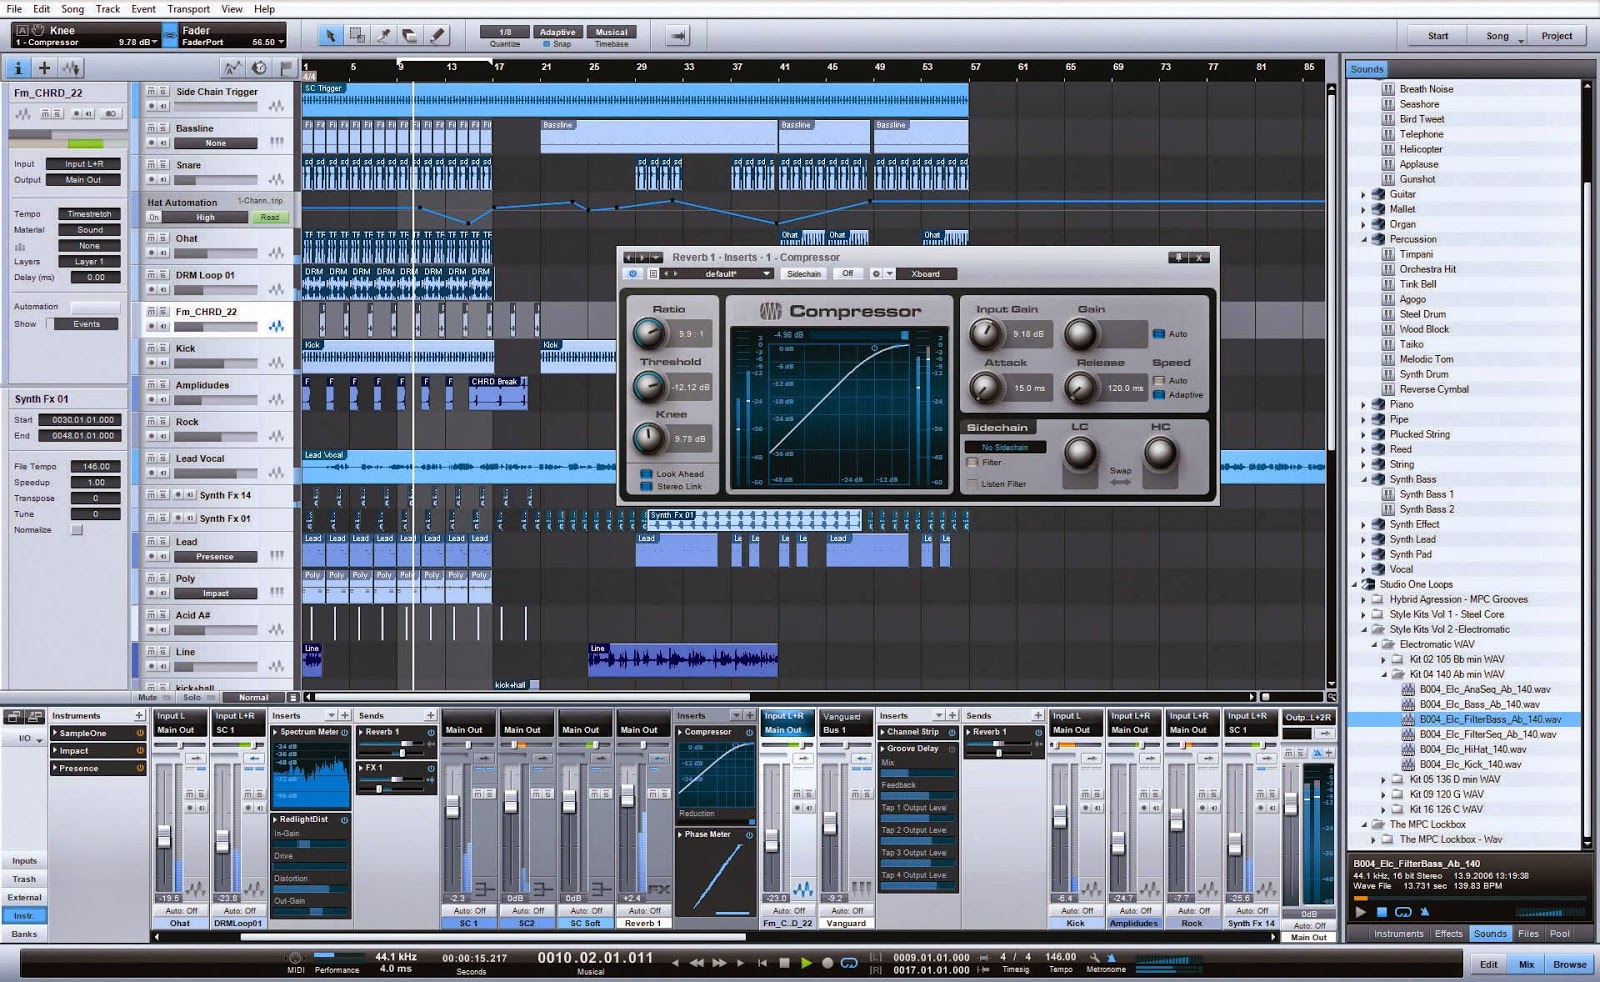
PRESONUS STUDIO ONE: ranging from 115,14€ to 460,72€ this daw is probably my favourite right now. It has a nice, smooth and clean interface, and a serie of feature that makes mixing really fast and stress free, plus it has a nice free version that makes you get acquainted to the interface before deciding to upgrade. 
This daw too comes with a wide selection of plugins and virtual instruments.


REAPER: this daw has a very strong and passionate community over the internet and it is the main choice of many small studios due to its cheap price (from 60 to 225$) and the fact that is a stable, reliable and feature packed piece of software, with a collection of plugins (called reaplugs) which can be downloaded freely and used in any daw, and these plugins most of the times will work better than the ones bundled in the other workstations. 
The interface is also customizable with skins and themes, and it works in portable version too.


CAKEWALK SONAR: another daw with a long past (comparable only to Cubase and Pro Tools) which has kept on improving with every release, becoming one of those who sets new trends and get copied by the competitors. Sonar was the first manufacturer (maybe along with Presonus Studio One) to incorporate a mixer-style channel strip on each channel with compressors and other processors integrated like in an analog console, and its quality and flexibility has simplified the workflow of many producers around the globe. Prices span from 106 to 533€, and the license can also be bought monhtly.


MAGIX SAMPLITUDE: Magix is another german producer which has a wide range of music solutions, which span in price from 49,99€ to 3050€ (of the "Sequoia version" of their daw).
Samplitude offers a very complete solution for the home studio, complete with mixing and mastering tools, at 99€, also with samples and virtual instruments, while the most expensive versions are obviously aimed to the most professional studios and feature tools rarely found anywhere else (for example metering tools with radio, television and cinema standards).


APPLE LOGIC PRO: a very complete daw, particularly popular in the U.s., that works as the "professional version" of Apple Garage Band. With only one version, full featured, at 199,99€, this software comes with a wide array of good plugins to mix "in the box" and supports a.u. plugins (audio unit), a proprietary standard, instead of Vst plugins. 


N-TRACK STUDIO: this software is probably the one with the lowest price to offer a complete digital audio workstation (49€ and 89€, but the 49 version has already all the features required for working in a home studio). The daw is cross platform (it has even an android version!), supports unlimited tracks, Vst and external hardwares, plus whoever buys the current version (the 7), has the free upgrade to the 8. The daw comes with a virtual drum instrument too.


MOTU DIGITAL PERFORMER: this daw has been a protagonist of the last decade, and is today supported by MOTU, one of the finest audio interface producer in the market. With a price of 499$, this software is a really complete workstation, with appealing graphics (and support for themes) and a very refined audio engine. It supports also music notation.