Labels

BASS (50) COMPRESSION (32) DRUMS (45) EFFECTS (49) EQUALIZATION (30) GUITAR (112) HOME RECORDING (95) IMPULSES (21) INTERVIEWS (19) KARAOKE (1) LIVE (10) MASTERING (61) MIDI (21) MIXING (179) REVIEWS (156) SAMPLES (69) SONGWRITING (19) SYNTH (3) VOCALS (31)

Saturday, May 28, 2016

Review: Presonus Studio One Professional 3


Hello everyone and welcome to this week's article!
Today we are reviewing a Daw, Presonus Studio One Professional 3!
Studio One is a Daw made by one of the most famous audio equipment producers in the world: Presonus, a company famous for its mixers, preamps, monitors and its audio interfaces, among the other things.

Studio One comes in 3 versions: Prime, Artist and Professional, and the differences in features among the three versions are listed HERE.
The basic version, Studio One Prime, it's FREE and has, like the other versions, unlimited tracks, buses and Fx Channels, but without the support to external Vst plugins (it has some bundled, though).   
There are also versions of the daw that comes bundled with the Presonus audio interfaces and mixers. 

This Daw is at the moment my main workstation because it offers more or less the same tools of any other high level Daw, but it does it in a faster, more comfortable and intuitive way.
The interface is elegant, graphically it's the most good looking on the market, and you can create large projects in a breeze, just dragging and dropping virtual instruments instead of having to route them, and in general it all feels faster and less complex.
Another thing I have appreciated a lot is the search browser, that lets you find easily what you need without navigating through endless menus, and this is especially useful when you have a lot of plugins or virtual instruments.

The version I am reviewing is the most complete available, and comes with 14 gb of samples, many virtual instruments, loops, the full array of plugins, the arranger track and scratchpad, and the support to 64bit (floating point) audio resolution, which is a pretty uncommon feature.

The latest update, the version 3.2, introduces some new feature, here are the most interesting:

- Vca Faders: similar to a bus track, it's a level control in which we can route other tracks, but unlike a group channel track, in this case when we change the level, all the automations are mantained, and so effect ratio applied to the tracks. 

- Console Shaper: a new plugin that allows us to set the "noise", the "drive" and the "crosstalk", which are characteristic of the old analog mixing boards, in our single tracks, groups or in the whole mix, so that we can choose what part of the mix to keep hi-quality and what may need some extra grit to sound the way we want.
Quoting the producers, here's how the console shaper works:

"The biggest news in version 3.2 is Mix Engine FX, a new plug-in paradigm exclusive to Studio One Professional that can modify or bypass and replace Studio One’s native mix engine. In contrast to conventional plug-ins that must be inserted independently on each channel, with limited or no interoperability, Mix Engine FX can process every channel routed through a bus, both individually at the source and at their summing point. Any bus, including the main stereo bus, can have its own Mix Engine FX assigned, allowing for limitless sonic possibilities.
Console Shaper, the first Mix Engine FX plug-in, uses State Space Modeling to re-create analog mixer system topology and componentry, turning Studio One’s 64-bit audio engine into an “analog” console with control over drive, noise, and true crosstalk across multiple channels. Console Shaper provides a compelling software alternative to expensive analog summing hardware while offering far more flexibility. Console emulation is only the beginning. PreSonus, Slate Digital, Softube, Acustica Audio, and other third-party developers are planning to release more Mix Engine FX in the coming months."

In conclusion, we suggest everyone to give this daw a try, downloading the free version on the Presonus website. 
Leave us a comment and tell us what you think!


Become fan of this blog on Facebook! Share it and contact us to collaborate!!

Saturday, May 21, 2016

Review: Pod HD


Hello and welcome to this week's article!
Today we are reviewing a Line 6 product, Line 6 Pod Hd Desktop!


This model is part of the Pod lineup, and it has been in production since 2012, although in 2013 is produced with the name POD HD X, because it has received a bump in the CPU specs in order to process better certain dual amp simulations that were particularly heavy in terms of resources.

The Pod Hd comes as usual in desktop version (this one in review), floorboard and rack version, and the difference between them is essentially in the amount of inputs and outputs.

This desktop version is really a swiss army knife: it can be used for the first time by two musicians at the same time, for example for a live acoustic duo with one guitar and one voice, and it has for the first time presets and amp models also for voice and bass (this is, in facts, the first generation of Pods that doesn't have a Bass Pod version).
The Xlr input has useful advantages, since it turns the unit finally into a full featured Usb audio interface that can finally be used for recording vocals, bass and guitar with good quality and low latency, also thanks to good drivers and a good managing software, that lets us also get into deep editing with relative ease.

The new hardware lets us enjoy great effect models and a good preamp section, although it's unexplainable why line 6 has chosen to not make the unit compatible with impulse responses, damaging the product when compared with an Axe Fx and Kemper, since we all know that the weak point of digital amp simulators has always been the speaker simulation section. 
Anyway the modeling is quite realistic, especially in the clean and overdrive area, in which for the first time in the Pod history we can really feel a good dynamic range and touch response.

The Pod Hd has also received through the year several firmware updates that has added more free amp and effect models, plus the support for additional paid model packs (a practice that to be honest we don't support, because we think that these software expansions should all be included in the price of the hardware unit).

The final judgement is positive, because the unit lets us (with a very good quality to price ratio) have amps and effects simulations, and a full featured audio interface good also for recording vocals and bass at 24 bit and up to 48khz. 


Specs taken from the website:

List of modeled amps:

  • Fender® Twin Reverb®
  • Hiwatt® Custom 100 (DR103)
  • Supro® S6616
  • Gibson® EH-185
  • Fender® Bassman®
  • Fender® Blackface Deluxe Reverb®
  • Divided by 13 JRT 9/15
  • Dr. Z® Route 66
  • Vox® AC-15
  • Vox® AC-30 (Top Boost)
  • Marshall® JTM-45 MkII
  • Park 75
  • Marshall® JCM-800 (2204)
  • Bogner® Uberschall
  • Mesa/Boogie® Dual Rectifier®
  • ENGL® Fireball 100
  • 19 delays (including cool tube and solid-state tape echoes)
  • 23 modulations (including both blackface-style opto and brownface bias-modulating tremolo, phasers, choruses and pitch effects)
  • 17 distortions (classic stompbox distortion, to vintage fuzz, to thick metal chunk)
  • 26 filters (including wahs and several exclusive custom filters)
  • 12 compressors and EQs (including stomp comps and studio tube compression)
  • 12 reverbs (from surfy springs, to studio plates, to cutting-edge digital room sounds)
  • 512 user-writable preset locations and built-in tuner with signal mute
  • Essential Project Studio ins and outs: ¼-inch input, XLR input, stereo balanced outs, phones, USB 2.0, S/PDIF out and FBV expression pedal control.


Saturday, May 14, 2016

How to use the arranger track and the scratch pad in our DAW (a guide for dummies)


Hello and welcome to this week's article!
Today we are going to talk about an interesting tool that will help us when writing or arranging a song, present in many of the most famous DAW in the market: the Arranger Track.

The arranger track is a sometimes overlooked instrument which can actually make us save a lot of time when writing a song, or when preparing different versions of the same song (for example an extended version, a radio edit, a 30 seconds commercial soundtrack version etc) without having to create a new project for each one.

Usually the arranger track works like this, for every Daw: you create it, then with the pencil tool you draw the parts (for example you can draw a part long as all the song's intro, and call it "intro", another one long all the verse and call it "verse", then one for the chorus and so on...), and then you can "move" those arranger track segments (e.g. "the verse") from one point of the song to another, and it will move all the single track parts below it.
This is particularly useful when writing a song, right after we have laid down all the single parts: we can move verses, choruses etc from one part of the song to another, multiply them etc with great ease, until we find the "perfect sequence" that will represent the final structure of our song.

This method described so far can be considered the "linear" structuring method, but in some Daw (like the latest versions of Cubase) we can also playback our songs in a sequential way: from the arranger menu, we can create a sequence and decide how many times to repeat a certain part, so that our project gets played as a sequencer (for example we can set: 1 x Intro part, 2 x Verse Riff, 2 x Chorus part.... and so on), and save multiple "chains" for the different arrangements we need, always using the same recorded parts.

One last thing, that is instead a prerogative of the latest versions of Presonus Studio One, is the Scratch pad.
The Scratch pad is a sort of "sandbox", a separate part of our project in which we can copy our project or our arrangement, and start modifying it without risking to ruin our main project (this is particularly useful in huge, multi song projects with a lot of tracks): we can copy there the parts we need, modify them, and if we like what we created, we can paste it back in the "official" project, otherwise we can get rid of it without risking to damage anything important.


Become fan of this blog on Facebook! Share it and contact us to collaborate!!

Saturday, May 7, 2016

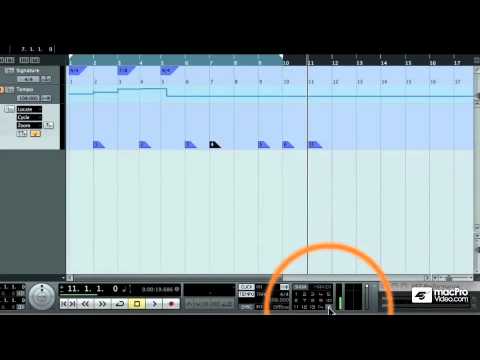
How to use markers in our DAW (a guide for dummies)


Hello and welcome to this week's article!
Today we are going to talk about a topic that is particularly important when mixing all songs in the same project (click here for a dedicated article), or during the mastering session, if we import all the tracks in the same mastering project: the marker track.

A marker track is a track that can hold markers, and these are used to locate specific places along the timeline of our daw project.
What does it mean?
It means, for example, that if we want to record 3 tracks in the same project we are going to add a tempo track (click here for a dedicated article), to tell the project that from a certain minute we need the metronome for example at 150, from another minute we need it at 200 and from another at 250, and then we can add a marker track to create 3 markers, one for the beginning of each song, so that we can move through them lightning fast.

So, once we have added a marker track in our project, how do we add these markers?
We set the cursor to any point we need to set a marker, and press the "add marker" button in the marker track: it will create a flag with a progressive number (1 for the first one, then 2, 3...), that we can move if we need, or rename it, for example in our case with the name of each one of the 3 songs in our project.

How do we move from one marker to another?
This varies from one daw to another: on Cubase there is a marker section in the transport bar, so we can choose them from there, in Studio One we can navigate through them with the skip controls, in other daws there is a vertical menu on the left sidebar with the list of the markers, but the concept is that somehow we have the ability of moving through them, and when we select one, the cursor will set at the marker's position.
This is very useful when mixing or mastering large projects, for example with 10 tracks, so that we can find easily the track we need, or we can use it to break down one single song among verse, bridge, chorus etc.


Become fan of this blog on Facebook! Share it and contact us to collaborate!!

Saturday, April 30, 2016

Inserts in the FX channel (or "how to effect an effect")


Hello and welcome to this week's article!
This article must be intended as an appendix of our Fx channel track article.

As we have seen there is no need while mixing to load, for example, a reverb on each track we need to effect, first off because it's better to use a reverb with the same settings for all tracks to give the impression that all the instruments are played together in the same room at the same time, and also because good reverbs are very heavy on cpu.

How can we do it?
We can create an Fx Channel track, and feed it (via the SEND function) to the single tracks, so that we have a reverb for every track, and eventually another one specific for voice and/or guitar solos (or for other particular needs).

Now that we have our effect track ready, we might need some improvement on it, for example it may happen that just feeding the reverb on the snare track, it makes the snare too dark, too "80s".
In this case we could set an EQ in the insert of the fx track with a high pass filter up to 1khz, for example: this way the reverb will only work from 1khz up, and not affect the part of the sound below it.

This method of stacking processors in the same effect track may lead to some really creative use, for example we could add a compressor sidechained to the kick, so that it activates the reverb (or anything else) only when the kick is not playing.... The possibilities are really endless.
Please let us know your favourite fx sends inserts in the comments below!


Become fan of this blog on Facebook! Share it and contact us to collaborate!!

Monday, April 25, 2016

How to organize our vst library (a guide for dummies)


Hello and welcome to this week's article!
Today we are covering a topic which is crucial especially when installing a new DAW, because once we have our vst folder already clogged in rubbish it becomes almost impossible to make order.

In order to improve greatly our workflow, we need to be able to find exactly the plugin we need very quickly, and in order to do this we need to keep our vst folder clean and organized.

If you are a mix engineer that likes to experiment and follows websites like this one you will probably have downloaded a million plugins, some free and some paid, to try them out (and then you forgot to uninstall them, even if you'll never use them), because often producers have somehow this sort of software bulimia that makes them amass huge amounts of plugins.
The result is that probably you will have your vst folder full of dodgy .dll downloaded from some vst repository in 1998 with a crack that doesn't even work with your latest version of windows, but you'll never know because you never run it.

Here's a few guidelines that will make your workflow faster, your hard disc cleaner and your vst scan much quicker:

1) Know every plugin that's in your vst folder: this is the toughest: if you have 500 plugins, you will hardly know 10% of them. The others were just downloaded because they were free for a short time, and you never actually tried them. Try to spend a hour into opening all of them and trying them out to see if they will EVER be of any use of if you already have better alternatives (in which case, go to point 2).

2) Delete what you know you will never use: this is crucial. We know you all are serial hoarders, but a daw each time it loads up makes a plugin scan, and the more rubbish we have in our vst folder, the more time it will take. Come on, you use always the same good eq plugin for each track, it makes no sense to have 40 free equalizers programmed in visual basic that you will never use.

3) Organize the plugins in folders: many Daws (like Cubase) creates voices in the insert menu named after the folders you put your plugins into, so it's a good idea, instead of letting your plugins roam free in your vst folder, to create themed folders (like "Guitar Amp Simulators", "Compressors", "Equalizers" and so on), in order to not clog completely your interface and lose time looking for that plugin you didn't remember the name....but it was somewhere....around page 9 of the menu....

4) Know your tools (in advance): this is connected to point 1, and it consists into choosing the best plugins you have and learn how to master them, not more than 1 or 2 for each task, for example one equalizer, one compressor, etc... You have no idea of how a mix can improve, only by using tools that we completely master under every aspect.

5) Watch out for compatibility: We often change computer, or Windows distribution, and just drag and drop the vst folder from one pc to another, forgetting that some plugin only works with 32 bit architectures, others only with 64 bit, some are compatible with Windows Xp but not with Windows 8, and some do the opposite. That's why is a good idea to load each one of them (as suggested in point 1) and see if it works, every time we change operating system, in order to avoid bad surprises right when we need something the most.


Become fan of this blog on Facebook! Share it and contact us to collaborate!!

Sunday, April 17, 2016

Quad Tracking Guitars (a guide for dummies)


Hello and welcome to this week's article!
Today we will talk about an interesting topic concerning guitar recording: quad tracking.

Quad tracking is a technique in which you layer four guitar takes doing the exact same thing in order to increase the wall of sound; this is particularly useful in genres in which the guitar player doesn't need to do particularly articulated riffs, like nu metal or metalcore, and in which the impact is the most important aspect.

There are situations in which this technique is not suggested, such as the bands in which the riffing is particularly fast and precise (therefore the result, unless the guitarists are exceptionally good, can be unpleasantly "hazy"), or when the sound is too crowded, for example when there's an orchestra, or many backing vocals part; this is a technique purely conceived for guitar oriented music in which the musicians wants to maximize the impact.

How to do it: there are many different solutions to try if we want to quad track a guitar part.
First off we need to record the part in four different takes, otherwise just taking one single take and copying it four times would only result in an increase of its volume, and we would lose the layering effect that creates the wall of sound.

Then we would need to spatially place the takes using the PAN knob:  we could put the external guitars pretty wide, for example 90% left and 90% right, and the other 2 closer, for example 50% left and 50% right, but there is no fixed rule: someone prefers to keep the internal ones a bit farther away (like 80%), someone else prefers to keep them a bit closer to the center (like 25%), it really depends on how crowded is the centre of your mix.

Now it's time to listen to the four tracks playing together: are we satisfied of the result? Or maybe now the guitar wall of sound is too predominant in the mix?
If the latter we must obviously lower the volume until it's perfectly balanced, but we can also try to equalize our guitars differently, in a creative way: we could for example try to retain some of the low end in the tracks closer to the center and try to focus the more external tracks on the mids and highs: this could bring the mix to a less dense guitar parts, mantaining the layering effect typical of the quad tracking.

Another technique to make the sound fuller is to use an amp (or amp simulator) for the most external tracks and a different one for the internal ones.

Do you have other interesting quad tracking tips? Let us know in the comment section!


Become fan of this blog on Facebook! Share it and contact us to collaborate!!