Labels

BASS (50) COMPRESSION (32) DRUMS (45) EFFECTS (49) EQUALIZATION (30) GUITAR (112) HOME RECORDING (95) IMPULSES (21) INTERVIEWS (19) KARAOKE (1) LIVE (10) MASTERING (61) MIDI (21) MIXING (179) REVIEWS (156) SAMPLES (69) SONGWRITING (19) SYNTH (3) VOCALS (31)

Monday, November 26, 2012

MODULATIONS PART 1: CHORUS! (with Free Vst Plugins Inside)


Hello and welcome to This week's article!
Today we're going to talk about Modulation Effects, focusing on the Chorus Effect.
Modulation effects are filters that takes a given signal and creates a copy, with a given delay and pitch modification, to be summed with the original one, creating a wide range of different results.
The Chorus effect is an effect that can enrich remarkably a sound: it doubles the sound creating a slighly delayed (usually around 20ms) copy whose delay will not be stable but will keep on variating, oscillating 5ms more and less, plus the copy's pitch is slighly detuned, giving the impression that the copy is (in case of a Vocal track) another person singing along with the first one: not identical, but very similiar, and this effect is used to make the original sound wider and fatter.
This effect was particularly used in the mid '80s, for Vocals and guitar solos, in order to add more character and make them sound more metallic.

The Chorus' most common controls are:

Depth: This control sets the depth of the effect: the higher the value is, the deeper will be the oscillations. Basically it's the Chorus' intensity. 

Rate: This one sets the effect cycle, which is the speed of the Rhythmic detunings, from very slow (less than a cycle per second), if we set it to 0, to very fast (rarely used), if we crack up the control.

Feedback: This control refers to the process of feeding back a part of the effected sound on the input of the effect itself, therefore we decide how much chorus will be sent a second time through the effecting process: this will lead to a much more effected result, good for creative uses.

Pre-delay: This control lets us choose after how many milliseconds from the original sound the effect will activate. A higher value will make the chorus to intervene after a longer time, allowing the original sound to be heard uneffected before it starts affecting it, while if we set it to 0, the effect will engage immediately.

Level: This one sets the mixing level of the Chorus with the original sound: a higher value will lead to a higher wet-to-dry ratio. 


Most of DAWs already features a Chorus effect, but if you want to try some cool vst downloadable for free here's our suggestions:

OrangeChorus: one of the best free Chorus Vst Around, very simple.

Blue Cat Chorus: versatile Chorus with Spread control

Kjaerhus Classic Chorus: a simple but effective chorus

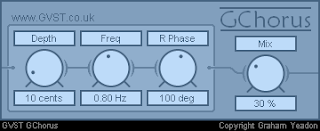
Gvst Chorus: simple and effective chorus Vst

Tal-Chorus-Lx: an interesting vintage chorus modeled after the Roland Juno 60

Betabugs Monsta Chorus: an interesting vintage chorus effect

Chorus Ch-2: a versatile Hi Quality modulation engine

SimpliChorus: an interesting Stereo Chorus effect

Sunday, November 18, 2012

HOW TO MIX A GUITAR SOLO (a guide for dummies)


Hello and welcome to this week's article! Today we're goint to talk abot How to Mix a Guitar solo!
Let's start off assuming that we have already recorded our solo, by Microphoning our amplifier, or using a Guitar Amp Simulator plugins, or even a Hardware Processor.
Once that our track is ready for mixing, we must keep in mind that our Lead Guitar track will share the same mid-range frequencies used by our rhythm guitars, so we must find a way to make the solo cut through while remaining "in the mix" at a volume comparable to the other intruments.
Usually the idea is to push the lead guitar part a little bit more on the mid-range than its rhythmic counterpart, just enough to make it cut through: we can treat it on a way similiar to how we mix Vocals, since usually a Solo takes the place of the voice in a song, therefore we can usually Pan it to the centre of the soundstage, unless we're after some particulare effect.

On the Equalization side we can usually use a wide Hi Pass filter, taking out everything from 160hz down, then (after the Compression) we can do a gentle boost on the "vocal area", somewhere between 3khz and 5khz.
It's a good idea also to cut some db on the rhythm guitars, in the same area we're boosting our solo: this will help us to cut through the mix even better (another Interesting way to cut through it's also to use a different guitar or amplifier than the one we have used for the Rhythm guitar Tracks).

On the Compression side we can use very fast attack and release times (even 10ms or less) and a low ratio, from 2:1 to 10:1 according to the amount of dynamic we want to keep, bearing in mind that the dynamic response it's a very important part of a good guitar solo, so we must not over-squash it: let's use less Compression than the amount we have used on the rhythmic side!

On the Effects chapter, it's important to say that a guitar sound is probably the one that accepts effect processing better, so we can use if we want some very subtle Reverb or some Chorus/doubler to give some thickness, but the most commonly used effect on guitar solos nowadays it's the Delay, which helps the sustain and gives to the sound a pleasant "bounce-back" feel. Some Tube Saturation or Harmonic Excitement can help the sound to cut through the mix even more.

Click here for a dedicated article about how to use an fx track for our solos.

Finally, if after all this processing we feel that our solo isn't emerging from the mix yet, our last resort is to Automate the rhythm guitar tracks to lower their volume a bit (half db or a db will usually be more than enough) in order to clear some headroom, to make our solo soar over them.

So Here's our Chain: Signal -> Subtractive Eq -> Compression -> Boosting Eq -> (Tube Saturation / Harmonic Exciter) -> Delay -> (Reverb)

Click Here if you want to learn how to Mix a Hi Gain Guitar!!


Become fan of this blog on Facebook! Share it and contact us to collaborate!!

Saturday, November 10, 2012

GUITAR AND BASS: WHAT IS RADIUS?


Hello and welcome to this week's article! This time we're goint to talk about Radius!
When we use the radius term, talking about guitar or bass, we're not referring to the radioactive chemical, but to how curve or flat the fretboard and the frets are.
Different roundnesses provide different playing feels, and some are better suited to particular styles than others are, but as a general rule, the flatter the radius is, the easier will be to go fast, and shred.

When we see the radius mentioned on a guitar or bass spec sheet, it is usually expressed in inches (ranging from 7.25" to 18", but there are even more extreme versions) and the higher this value gets, the flatter the fretboard will be.
The idea behind a more curvy or flat neck is based on the type of music we need to play: a curved radius (e.g. 7,25" or 9,5") will be more suited for playing chords, since the fretboard will "accept" more easily the shape of our hand, especially when doing Barre Chords, while flatter radiuses (e.g. 15,75" or 18") will let us do easier bendings, and advanced techniques as string skipping or sweep picking.

The ideal middle ground has been introduced by Gibson and is the radius of 12", which is still the most common today (on Bass instead is often used a radius of 10"), but throught the years some manufacturer (such as the same Gibson, or Charvel and Jackson) has introduced also a compound radius that starts from 10" on the nut area (to be more "chord friendly") and progressively becomes flatter, to 16" on the other end of the neck, to let solos to have more sustain (in facts the rounder the neck, the farther the "external" strings will be from the fretboard). 

Hope this was helpful!

Become fan of this blog on Facebook! Share it and contact us to collaborate!!

Saturday, November 3, 2012

HOW TO RECORD AND MIX DRUM CYMBALS (PART 2/2)


CLICK HERE FOR THE PART 1/2 OF THIS TUTORIAL!

Once we have seen how to acquire our cymbals sound, we sould now find ourselves with Four mono tracks: two for the Over Heads (Left and Right), one for the Hi Hat and one for the Ride, therefore now it's time to start mixing.

- Overheads: the idea is to Pan those two tracks very wide, often 100% left and 100% right, to give to our Crash Cymbals as much space as possible, then we need to Hi Pass and Low pass them, in order to give to the tracks a proper frequency range that will not make them fight with the others.
First off we should create a Group Channel track where to route the two single tracks, and then we can start off by loading on the Group Channel a Hi-Pass Filter, taking away everything below 100hz to 500hz, until we find the spot where the bulk of the drums disappears (unless we don't want purposely to retain some spill on those tracks too, to beef up the global drum sound), then we can Low-Pass around 10/12khz, to avoid the sound to become too harsh.
Now the only thing left to do is to start manually to pin down the Resonant Frequencies (which are, if we look at the Spectrum of our sound, the frequencies that produces the highest and most annoying peaks), and see if our cymbals are Eq Masking the frequencies of other important tracks (Vocals, for example).
If this happens, it's a good idea to scoop a bit around the 3/4khz area to clear some room for Vocals, and if needed we can also take away something around the 500hz area too, to eliminate a bit of "Room Mud".
The last thing to do, if needed, is to Compress the sound just a little, in order to soften a bit the hardest hits.

- Hi Hat: This cymbal is seen more as a part of the snare sound than an ambient cymbal, and therefore shouldn't be Panned too far from the snare: someone sets it straghit to the centre of the soundstage, someone else pans it slightly to the left (about 12.5 left), as if it's heard from the drummer's perspective.
We can Hi-Pass the sound, as for the others cymbals, until most of the snare goes away (300 to 500hz, usually) and then Low-Pass it at about 10khz, eventually taking out some other frequency if the general sound feels a bit "gongy". To add some brilliance we can boost a little around 6khz.

- Ride Cymbal: this cymbal should be Panned usually somewhere on the right area (like 12,5 right), and its particularity, compared with the Hi Hat, is a usually stronger low end. In order to make the ride sound brighter we can Hi Pass the sound to about 3/500hz, then we can boost a couple of dbs at about 10/12khz to add some air and sparkle. Watch out for resonances on this track too!
Similarly to the Hi Hat, if we feel that there are some frequencies that are fighting with the Vocals ones, we can scoop around 3khz.

We can also route the Hi Hat and the Ride Cymbal on another Group Channel Track to add a little bit of Compression, just to peel off some of the peaks.

Very important: If we're using Compression (and usually it is suggested for hard rock songs, up to the most extreme metal, not for softer genres), we must keep in mind that the settings should be very very low, since it's really easy to create an unnatural effect with cymbals! Same is for Reverb: usually it's not suggested, but in some cases, when the overall drum sound is very dull and lifeless, if we use a Plate Reverb on "homeopathic doses", it can add some body and room to the general sound.


Become fan of this blog on Facebook! Share it and contact us to collaborate!!