Labels

BASS (50) COMPRESSION (32) DRUMS (45) EFFECTS (49) EQUALIZATION (30) GUITAR (112) HOME RECORDING (95) IMPULSES (21) INTERVIEWS (19) KARAOKE (1) LIVE (10) MASTERING (61) MIDI (21) MIXING (179) REVIEWS (156) SAMPLES (69) SONGWRITING (19) SYNTH (3) VOCALS (31)

Saturday, January 28, 2012

HOW TO USE EQUALIZATION (free Vst Plugins included) PART 2/2


Finding the right frequency to adjust is, of course, the most important thing. With time you will get familiar with some of the most common frequencies, but what if you’re dealing with a new sound, or just don’t have the experience to know where to start? Here is an easy way to find the right frequencies  to deal with.
What you need is an EQ that allows you to control the target frequency. Boost one band all the way. If the band has a “Q” control make it quite high (Q stands for “quality factor” and it controls how wide the area affected by the boost or cut will be).
Then, play the sound and slowly sweep the frequency back and forth until you find the point where the tone you are looking to focus on is loudest. Make a note of the frequency and put the EQ back to zero. You now know the frequency where your target tone occurs and can cut or boost appropriately.
It’s a good rule that when cutting it’s best to use a narrow (high) Q, while it is better to have a wide (low) Q when boosting. This will help keep your EQ not excessively invasive.
The main reasons why it is better to cut than to boost is that excessive EQ boosting in a mix usually results in muddiness and loss of clarity, so as we already said, use eq with parsimony.

The low-mid range is where all the fullness and body lies for most of the instruments. For this reason it can be tempting to give those instruments plenty of low-mids. The problem is that all those low-mids fight for room in the mix and if you aren’t careful you’ll be left with an engulfed, unintelligible mess.
Think of your mix as a physical space: the more instruments you put in your mix, the harder it will be to fit everything in.
Therefore, more instruments in a mix, the more important it becomes to keep an eye on the areas where their tonal ranges tends to overlap. Each instrument needs its own place to sit in the mix, so any time there is a common range you need to choose which instrument takes the forefront in that frequency range.
For instruments that have the same basic range, such as bass and kick drum or two guitars, you can use the EQ to interlock them making them both distinct, unless you want a particular effect, as the "rhythm guitar wall of sound".
Apart from these cases, any frequency boosted on one instrument, should be cut in another and vice-versa. In the example of a bass and kick drum, if you boost the thump of the bass (100 Hz) then it could be wise to cut at 100 Hz from the kick drum.

Talking about frequencies, and how to use them for single instruments, first off let's say that on the website RECORDINGEQ.COM there is a very interesting page with many standard frequencies, and the explanation of how they affect the mix, I think it's a great starting point as a reference, so check it out.

If we want to simplify, though, here are some eq references to begin with:

9KHz-15KHz:
Adding will give sparkle, shimmer, bring out details.
Cutting will smooth out harshness, and darken the mix.
Common processing: Very little compression, add/reduce gain for
timbral shaping.

6KHz-15kHz:
Air and presence.
Common processing: Slight gain boost.

4KHz-9KHz:
Brightness, presence, definition, sibilance, high frequency distortion.
Common processing: Compression to reduce sibilance/HF distortion. Add
(gain) brightness or liveliness to a mix.

5Khz-7KHz:
De-essing. Narrow band compression.

800Hz-4KHz:
Edge, clarity, harshness, defines timbre.
Common processing: gain reduction to reduce harshness.

200Hz-1.5KHz:
Punch, fatness, impact.
Common processing: Compression and gain boost.

150Hz-400Hz:
Boxiness.
Common processing: Reduce gain to remove 'mud'.

200Hz-below:
Bottom.
Common processing: Compression to tighten a boomy bass sound.
(source: http://www.dogsonacid.com/showthread.php?threadid=25008)

Focusing on ROCK/METAL GUITARS, my first suggestion is to try to get the right eq before recording, or directly on your guitar simulator, in order to modify it with vst equalizers in the most subtle and less invasive way possible.
First thing, let's remove everything you’re sure you won’t need, for example for someone, frequencies around 100hz are useless for a metal guitar, since it's a boomy area and taking it out will increase clarity. Next are the hiss, or fuzz frequencies which usually lie around 5050k, 8k, and 9650k. Dipping these frequencies by a few DB will take out the hiss, especially created by digital amp simulators, but can take some tone with them at times. Remember; it’s all experimentation!
Someone prefers even to cut everything above 7khz (or more) to get a more mid-focused sound. To me it looks a little too much, better to low pass the sound starting by a higher frequency, like 12khz, and to high pass above 80hz.
Now we may add some EQ, lowering a little bit around 250hz and 650hz for a deeper scoop of middiness (if needed), and some 8k dip for clarity, to get rid of some of the boxiness.
About the frequencies to boost, it obviously depends on the type of sound, and more than often a good guitar sound doesn't need any boosting at all, but sometimes I found that adding a couple of dbs around 200hz and 3235hz may help to achieve a more aggressive sound.

Here are some of the best Free Vst Equalizers around:

Sonimus SonEq
http://sonimus.com/site/page/downloads/
Windows: VST
Mac: VST & AU

SPL Free Ranger
http://plugin-alliance.com/en/plugins/detail/spl_free_ranger.html
Windows: VST, RTAS, AAX
Mac: VST, AU, RTAS, AAX

Elysia Niveau Filter
http://plugin-alliance.com/en/plugins/detail/elysia_niveau_filter.html
Windows: VST, RTAS, AAX
Mac: VST, AU, RTAS, AAX

BX Cleansweep (Hi&Lo Pass Filter)
http://plugin-alliance.com/en/plugins/detail/bx_cleansweep_v2.html
Windows: VST, RTAS, AAX
Mac: VST, AU, RTAS, AAX

Variety of Sound Boot EQ mkII
http://varietyofsound.wordpress.com/vst-effects/
Windows: VST

CLICK HERE FOR THE PART 1/2 OF THIS TUTORIAL

CLICK HERE FOR A GUIDE ABOUT HOW TO RECOGNIZE THE FREQUENCIES!

Become fan of this blog on Facebook! Share it and contact us to collaborate!!

Saturday, January 21, 2012

HOW TO USE EQUALIZATION (free Vst Plugins included) PART 1/2


Hello! Today we're going to talk about equalization.
The job of this effect is to correct the timbric shape of the sound, operating on its frequencies. Usually with the term "equalizer" we can refer to any tone shaping control, and on the guitar amplifiers we usually have it under the form of pots, often divided in lows, mids and high frequencies.
First we can divide equalizers in two groups: active and passive.
The passive equalizers are nothing but filters that limit the passage of the selected frequencies, so they can not amplify a certain frequency but only cut. Most of common guitar amplifier equalizers are passive.
Active equalizers, instead, are the ones that attenuate or amplify a selected frequency, so they can be  not only used to cut but also to boost certain frequencies (those are more rare on guitar amps, but some amp, like the Peavey Triple XXX, has them).
Then we can divide equalizers under a functional viewpoint in three groups: Analytic, Graphic and Parametric.

Analytic equalizers support a regular boost-cut control, and an extra control that gives the ability to move upper or lower on the audio spectrum the central frequency of the regular control. Usually we can find this on the mixing boards, and an example of it may be the free REAEQ vst.

Graphic equalizers were formerly created for the recording studio, but today they can be found on many guitar amps (for example Mesa Boogie Mark IV), or as a stompbox or rack effect.
A good example of graphic equalizer is the free KJAERHUS Classic Eq Vst.

Parametric equalizers are usually different: their interface is made of pots instead of a graphic representation of the spectrum, therefore forcing you to rely even more to your ears, and they supports a control to shape the width of the frequency modifications, called "Q". A good example of this approach to the matter is the free PUSHTEC EQ Vst.

When to use Equalization: EQ should be the last resort. This said, you should try to get your tone as perfect as possible right from the beginning: if you’re not completely happy with the tone you’re getting without an EQ, then keep trying different recording strategies before deciding to use it, as it will unavoidably affect the realism of the sound.
When recording with microphones, their placement can be one of the biggest factors here: don’t be afraid to spend the time trying as many different placements as necessary to get the right tone.
Keep in mind that small changes in placement can make a big difference, as for example pointing the microphone right towards the center of the cone or to some other point halfway between the center and the border, or keeping it perpendicular to the cone instead of setting it angled.

If you have great tone from the start, then EQing during the mixing process will be little more than gently pushing the sound into its place on the mix.

Beware of Frequency Masking: Frequency masking is where the frequencies of two (or more) instruments are fighting for the same place in the spectrum, and it is one of the most common problems encountered when mixing.
In facts, a sound may have (in addition to its root frequencies) other Harmonics that contribute to its overall timbre. If two sounds share similar frequencies you could easily find yourself in the position where some of these Harmonics are being masked in the mix; meaning that the instruments sound different than they do in isolation, or just disappear, and this problem emerges with more clarity while listening to the mix in mono.
There are three ways to deal with eq masking problems:

1 - Try to Pan the two sounds on different places of the soundstage, and see if the problem is solved.

2 - Create a priority list of your tracks, and start carving some db from the troublesome are of the "less important tracks", until you can hear with more clarity the primary tracks (e.g. Vocals).

3 - When the aforementioned operations are impossible, the last chance is to modify the arrangement of the song, taking out one of the fighting tracks from the part where the mix becomes too crowded to be heard clearly.

CLICK HERE FOR THE PART 2/2 OF THIS TUTORIAL

CLICK HERE FOR A GUIDE ABOUT HOW TO RECOGNIZE THE FREQUENCIES!

Become fan of this blog on Facebook! Share it and contact us to collaborate!!

Saturday, January 14, 2012

HOW TO USE IMPULSES (free VST plugins included)


Hello and welcome to another post of this blog! Today we're going to talk about Convolution Impulses. 
Convolution impulses are digital simulations of the reverberation of a physical or virtual space. 
Why do we need them? Because today those are the best replacement for guitar cabinet simulation. In facts, you may have noticed that the main issue of Guitar Amp Simulators (both hardware, like Pods, or software, like Amplitube) is the cabinet simulation and microphone response: they sound harsh, fizzy and plastic, because although they are impulse-based, their response is not accurate enough.
The web nowadays is full of impulses free to download and to experiment, and many of them are really accurate and realistic, that is the reason why many studios use them instead of microphoning a real cabinet. They are great for Reamping too, and can be used with any kind of preamp (a preamp vst, a digital multieffect or a real tube head, through its preamp out), taking the place of power amp, cabinet and microphone.
Just connect the preamp/pedal output into your soundcard, load one of the programs made to play them (for example on this guide we're gonna take a look to VOXENGO BOOGEX), load an impulse and play: if you hear a normal tone, with no harshness/fizzyness, you're done.

WARNING: Do not connect the power amp output of your head to your audio interface! Use the preamp output or the Fx-Send. If you have a tube power amp, you have to connect it to the cabinet anyway in order to prevent tube damages! 

Here's how to load an Impulse on Voxengo Boogex

First off turn off the cabinet simulation of your software or hardware (for example, with Amplitube 2: go into the cab section and activate the BYPASS switch you see in the upper right corner, or with the Pod Hd just take the cab icon away from the chain of your preset, setting it to No Cab), if you have bypassed the cab correctly, when you play a distorted preset you'll hear an awful sound, fizzy as hell, no bass, harsh... You're hearing how an amp sounds like without a cab

Now load Voxengo Boogex (I chose to explain this among the others because it's free, not too heavy for the ram and with zero latency, but there are many others around for free, as KeFir),
Boogex is an amp-sim, if you want to use it ONLY for cab simulation, you have to set all the parameters FLAT, or it will change your eq/sound.
So, open it and set, from the left: Lows Mids and Highs to 0db, Tone to 0%, Drive to 0db, Dynamics to 0%, Phase to 0%, The "Out" control it's the volume control, Dry Pre Cab and Dry Post Cab to "-inf" (knob all the way down).
The "Speaker Cabinet Impulse Response" button MUST be ON, obviously, then click on "file" and select your impulse (a .wav file).
Another interesting thing about Boogex: this software features a built in Low Pass Filter and High Pass Filter. Since they can't be totally bypassed, the best thing to do is to open them to the max, by clicking on the green point in the right area of the graphic section of the interface and move it all the way to the right, then click on the white point in the left area and move it all the way to the left. This will deactivate the filters.

Here are some great free impulses to load:


If you have or know some other interesting impulse to suggest to our readers feel free to tell us!

Additional Awesomeness: some speaker simulator plugin (such as Poulin's LeCab2) gives you the opportunity to load more than one impulse and blend them together, as if the speaker is microphoned with two or more mics. This opens up a very interesting world of variables, if carefully managed, but can also harm your final result, so use it carefully :)


Become fan of this blog on Facebook! Share it and contact us to collaborate!!

Saturday, January 7, 2012

HOW TO USE COMPRESSION (free Vst Plugins included)


Hello! Today we're going to talk about a fundamental tool for mixing and mastering, and to take a look to some practical tips on how to use it.
Compression can be seen as an automatic volume control, with the volume being turned down very quickly every time a loud sound occurs, and the volume of the quieter sounds being turned up in order to match the louder parts. The result is a smaller difference between loud and quiet sounds, making the signal sound ‘compressed’.

First off let's take a look to the main controls featured in most of the compression processors:

Threshold: A compressor reduces the level of an audio signal if its amplitude exceeds a certain threshold. This value is commonly set in dB, where a lower threshold (e.g. -50 dB) means a larger portion of the signal will be treated (compared to a higher threshold of −5 dB).


Attack: The 'attack phase' is the period when the compressor is decreasing gain to reach the level that is determined by the ratio. The shorter is the time, the faster the compression will engage.


Release: The 'release phase' is the period when the compressor is increasing gain to the level determined by the ratio, or, to zero dB, once the level has fallen below the threshold. The longer the time, the more the compressor will keep applying the effect before stopping.


Ratio:  This allows the user to control the proportion (usually in decibels) by which signal exceeding the threshold will be reduced. This basically means that the output volume will increase of 1db for each value set on the ratio: the higher the value (es. 20:1), the more the volume differencies between low and high will be normalized.
The highest ratio of ∞:1 is often known as 'limiting'. It is commonly achieved using a ratio of 60:1, and effectively denotes that any signal above the threshold will be brought down to the threshold level (except briefly after a sudden increase in input loudness, known as an "attack").


Make up Gain: Because the compressor is reducing the gain (or level) of the signal, the ability to add a fixed amount of make-up gain at the output is usually provided so that an optimum level can be used.


Soft/Hard knee: Hard knee compression reduces gain abruptly on any signal exceeding the threshold (and not at all on signals below it). Soft knee compression introduces gain reduction gradually on signals approaching the threshold, and progressively (up to the ratio set by the user) as they exceed it. Most compressors with an "auto" function apply soft knee compression when "auto" is selected.

When to use compression: Compression is a great effect to be applied both on single instruments (on the mixing phase), and the whole track, on the mastering phase. The instruments that usually needs to be compressed in order to sound tight are usually (as we have already seen) bass, vocals and drums; guitars don't need always to be compressed, it really depends on the music style (for example funky or other clean styles, like the acoustic guitar, may need it, while heavier genres often stick to gain, which is a natural compressor, and use a tip of compressor only if needed).
In order to see some tips about how to compress these single instruments, click on the links to go to the dedicated article.
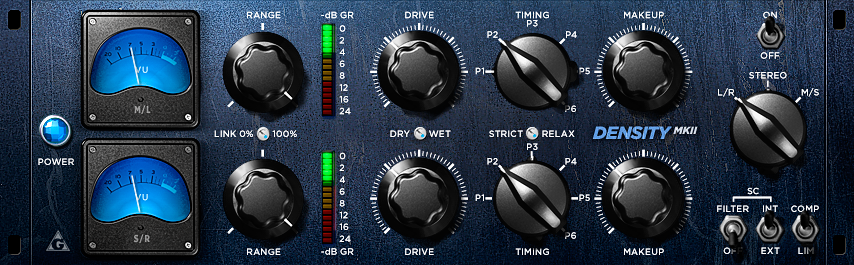
On the mastering phase, bus compressor is a valuable ally, since it helps to "glue" the instruments together and give to the mix the punch it needs to sound properly. Today there are many vst bus compressors that emulates the solid state ones that made the history of music, and between them we can suggest some free ones: Density and Antress.

How to start compressing a sound from scratch: Here's the basics to start using a compressor (for example the free ReaComp) on a single instrument, for example the drum kick.
First off, lower the Threshold as far as it will go, and increase the ratio all the way. You should hear that the kick sound is extremely over compressed, now lower the attack time to the shortest setting possible.
Now, If you slowly rise the attack control, you will hear the sound start to ‘click’ – when the click becomes fairly pronounced you know that the transient ‘attack’ on the drum is coming through, and that your attack setting is correct.
Now that the attack is set correctly we can return the threshold and ratio controls to something more realistic, for example a ratio of 5:1. Now raise the threshold to a level where you feel the drum start to come back to life, and keep it there. In this phase you can keep the makeup gain on auto, but if you're not satisfied with the result, you can always turn it off and set the gain manually in order to match the volume of the compressed drum kick with its uncompressed version (hit "bypass" to check).
Setting the release time is also important, as if the compressor has not ‘switched off’ before the next drum hits you will have wasted your time setting the attack control. 
As a general rule you’re going to want to have the release control set on a "not too long" time, but you can get some strange effects if you lower it too far. A good guideline is around 200ms, but it’s a good idea to check that your compressor’s gain reduction meter has returned to zero (or near) before the next drum hit sounds, if you want to be sure not to have any problem.

Addictional awesomeness: Remember that after compression you may also need to EQ a little bass back into your sounds, as compression often affects lower frequencies. Also, if your drums are going to be compressed again after this initial compression (for example with parallel compression, or bus compression), then you may need to be more gentle with your gain reduction, in order to avoid a final result excessively "squeezed" (over compression).
Plus, if you have some compressor that colours the sound on a particular way that you need for your mix, you can also try SERIAL COMPRESSION, which basically consists in using more compressors on the same chain, one after the other, set very low to not oversqueeze the sound. But beware, you really have to be careful, otherwise the obtained sound will be a total disaster!

Here are the Advanced Compression techniques:


PARALLEL COMPRESSION

MULTIBAND COMPRESSION

SIDECHAIN COMPRESSION

BUSS COMPRESSION

SERIAL COMPRESSION


Become fan of this blog on Facebook! Share it and contact us to collaborate!!
Saturday, December 24, 2011

HOW TO RECORD AND MIX THE ACOUSTIC GUITAR (free Vst Plugins included)


Hello everybody and welcome to this new tutorial! Today we're going to talk about how to record an acoustic guitar, an instrument that needs to be reproduced as natural sounding as possible to be good, and that is the reason why it cannot be digitally recreated via synth in a credible way.
First off let's say that there are two ways to record an acoustic guitar: using a microphone, or (if the guitar has a pickup), using the jack output of the guitar itself.

- Using the Microphone: first off you need a microphone suited to record acoustic instruments, such as the Shure Beta57, but there are many others very good and probably cheaper, for example made by Sennheiser. Condenser microphones may be even better, but they need an acoustically treated room in order to play at their best, so check the environment carefully before choosing.
Now we need to find the "sweet spot" of the guitar where to point the microphone, keeping in mind those rules: if you point the microphone toward the bottom of the guitar or behind it, the sound will result very deep and full of bass frequencies, same is if you point toward the sound hole: you will get a bassy sound that captures the internal resonance of the guitar.
The more you move toward the neck, the more you'll capture the strings sound, so the higher you will go in the neck, the more the sound will be brilliant.
Obviously you'll have to hear and decide for yourself, but I would consider a good spot the area near the 12th fret: this is where the neck joins the body and is usually regarded as the best place to record the acoustic guitar, since it is where we capture a full and even frequency response from the instrument; not too bassy and not too brilliant. If you need some extra string sound, you could also place another mic at the first fret to capture the nuances of the strings.

A typical miking setup for the acoustic guitar is with two Condenser microphones: one pointing the 12th fret, the other one pointing the bottom of the guitar, always on the front side as the other one: the one pointing to the bottom of the guitar will catch some low end that will later be mixed with the sound acquired with the other mike. At these two microphones can be added a third condenser one, set about one or two mt. away from the player in order to catch some of the room Reverb.
Click Here for a dedicated article about how to microphone an Amplifier.

- Using the pickup: Many acoustic guitars nowadays, even the cheaper ones, have built-in a piezo pickup, and a battery-powered preamp, sometimes even with an equalization section too!
To record the sample in the video for this article, I have used an Ibanez V72 Cent, a cheap acoustic guitar with a built-in preamp, a volume, bass and treble control, and a built-in tuner too.
So first off I have found a good compromise in the built-in equalization, slightly cutting the treble and boosting the lows to give it a more "round" tone, then I went with the jack straight to the input of my audio interface.

- Once you have the signal on your D.A.W., is time to process it. You can use any plugin you want, usually any D.A.W. has some processing plugin bundled, but if you need some, I suggest you the Reaplug Suite, which is freeware and it sounds great.
First off I'd suggest to Equalize, but be very gentle: we need to preserve the naturality and the tonal richness of the acoustic instrument, so there's no need to overprocess the signal: we may just use a high pass filter to take away the lows we don't need, such as the frequencies below 50hz (sometimes, if we're on a more dense mix, it's best to take out everything below 100hz, or even 2/300hz, if we want just the guitar strum to pop out of the mix), and gently subtract a little (-3db) in the areas around 100-300 hz and 1-3 khz, if the sound is a little boomy or needs to be more open and transparent. Boosting between 5khz and 10khz will add sparkle, cutting between 1khz and 3khz will reduce harshness.
For the solo parts, we can instead boost some decibel (e.g. 3), to the 5-7khz area, in order to add some presence.

Now it's time for Compression, which can be normal or multiband. For the normal compression, just set a ratio between 4:1 and 12:1, according to the dynamic range of the song (the more volume differencies between quiet and loud picking, the higher the ratio should be), short attack (around 20ms) and medium release times (around 0,5sec), and a threshold set to around -15db.
The Multiband Compression, instead, gives you the opportunity to choose the amount of compression to apply to the single frequency areas, which can be adjusted through the controls.
This may be useful, since it can be used as a halfway between a compressor and an equalizer, and can help to reduce volume and presence of single areas of your signal (for example the lows between 100 and 300hz) and boost others (between 5 and 7 khz), without changing the overall tone.

Once you are satisfied with your tone, you can add (if needed, especially if you have recorded directly from the jack output) a Harmonic Exciter to add some sparkle to the tone, or a Reverb, like Freeverb, set very low, just to give to your sound that little resonance that it needs to be realistic; we can use for example a Plate reverb to add vitality, with a decay time of between 2 and 3 seconds.

So the Chain is: Guitar->Equalization->Compression->Harmonic Exciter (if needed)->Reverb (If Needed)

Cheers everybody and Merry Christmas!!

Become fan of this blog on Facebook! Share it and contact us to collaborate!!

Saturday, December 17, 2011

THE PERFECT GUITAR EFFECT CHAIN ORDER


Hello!! Today we're going to talk about the guitar effects chain, focusing on the exact order of your stompboxes (or rack effects), from the guitar to the amplifier input.
First off if you see the image, I have divided the signal chain in three areas: the first is the Pre Gain Area, then we have the Gain Related Area, and finally the Post Gain Area.

- The Pre Gain Area:  this is where the signal chain begins, and where we should set the effects that needs to be applied to the signal before the Gain Related Area. 
Here is were we put utility processors like TunerNoise Gate, then we can apply filters like Wah Wah or Envelope Filters, next is the place for Dynamic Controllers, like a Compressor, and the "area" ends with the intelligent processors, such as Harmonizer or Pitch Shifter.

- The Gain Related Area: this area needs to be separated from the others because it changes dramatically the signal, so any effect that expand the sound, like delays, must be put after this area, if we want to avoid to distort the delay repetitions too. 
This is where we put our Overdrive, Distortion or Fuzz.

- The Post Gain Area: this is the last area of our guitar signal chain, and includes time-based modulation effects (chorus, flanger, phaser, tremolo and many others) and pure time-based modulations (such as delay and reverb).

Very Important: If instead of using gain related stompboxes you wish to use directly the overdrive channel of your guitar amp, the preamplifier of your amp itself becomes the Gain Related Area, so you need to move the Post Gain Area to the Fx Loop of your amplifier (via the "Send" output, set all the post gain effects you need, and then go back into the amplifier through the "Return" input). 
And that's it, your perfect guitar effects chain is ready!

So here is our chain by areas: GUITAR -> PRE GAIN AREA -> GAIN RELATED AREA -> POST GAIN AREA -> AMPLIFIER

Here is the effect order: GUITAR -> NOISE GATE -> WAH/FILTER -> COMPRESSOR/LIMITER -> HARMONIZER/PITCH SHIFTER -> OVERDRIVE / DISTORTION / FUZZ -> CHORUS / FLANGER / PHASER / TREMOLO -> REVERB / DELAY -> AMPLIFIER

A small note about EQUALIZATION: its position is variable. Someone likes to add it after the Wah. Someone puts it Before the Amplifier (at the end of the chain), someone puts it in the effects loop. Someone even combines two or more of these positions, for example it's suggestable to cut before the Compressor and boost after, so feel free to experiment!!

Become fan of this blog on Facebook! Share it and contact us to collaborate!!


Sunday, December 11, 2011

HOW TO: THE BASIC MASTERING CHAIN (free Vst Plugins included) PART 1/2


Tutorial version 2.5, august 2016

Hello! Today we're gonna see how to master a song, trying to analize the single steps in order to give to your (already mixed) track the final boost it needs to be loud and sparkling, enough to be compared to the commercial tracks.
Let's start from the assumption that the perfect mix just needs to have its volume raised to 0db on the mastering phase, but more than often other processes are needed in order to achieve a good final result.
Obviously there are many ways to build a mastering chain, as always I'm gonna explain you the basics and suggest some free plugins, then you will adapt these ideas to your project and your plugins.

- First off, load the track containing your mix on a stereo track, on a new project, making sure it isn't too loud (I would recommend to keep the mix it around -10db, to give you enough headroom to work in the mastering phase), in order to avoid clipping; it is also importanto to make sure the track is cleaned of all hiss, pop, crackle and noise before stating to master it, or the problems will get worse.


- The first plugin to add to our buss is an equalizer (for example ReaEq), if you feel there's some frequency to correct; that way you'll be able to shape (very lightly) some general frequencies that doesn't satisfy you completely after the mixing phase, usually eq is used in mastering in order to scoop very lightly the mids (more or less -1db around 300hz), and boost gently lows and highs (+1db around 50hz and 5000hz), but actually the best way to eq during mastering is by using a Mid/Side equalizer, the way described here. After these adjustments, using the same eq plugin, create a high pass filter to remove all of the frequencies under the 30hz, in order to clean the mix of the almost inaudible and useless frequencies, like rumble and breath. 

If we feel that the final sound is still a little bit thin and dry, and we didn't use a lot of Reverb during the Mixing phase, we can also try adding some Mastering Reverb. It consists into adding a Reverb with very low settings, a regular "Room Size", a low Wet/Dry ratio and a Low Pass and High Pass filter between 100 and around 2000hz. It's very important to not overdo, though, since this can really screw up everything :) The position in the Chain is Typically between the Equalizer and the Compressor, but it can be moved after the Compressor if we feel that the Comp is making the effect too strong.

- Now we must focus on the different areas of the mix, and try to point out if there are certain parts (for example, the drum snare) which are too low, or others (for example, the cymbals) too loud, and try to correct the problem; you can do it with the eq, like on the last point, or use this other method, that is less invasive and "coloring", which is the multiband compression (Click Here for an in-depht article on the topic). 
There are many multiband compressors around, and there are some bundled in almost every DAW on the market, but if you need a freeware one, here is a list where you can choose from. Using a multiband compressor lets you choose graphically which part of the curve (i.e. only the highs on a certain frequency) to compress, leaving the other frequencies of the mix unprocessed, and it's a very useful tool to make aimed corrections.

- Now we can add to our mastering buss a Tape Saturation plugin, that produces a slight Compression and Saturation without squashing too much the overall sound, but this depends mainly by the song and by how much compression you have already applied on the single instruments and on the Mixing Buss. Alternatively we can use an Harmonic Exciter, in order to give some sparkle to the high frequencies, and some thump to the lows.

CLICK HERE TO READ PART 2/2 OF THIS TUTORIAL!!


Become fan of this blog on Facebook! Share it and contact us to collaborate!!